Inductive kickback voltage, diodes/resistors, and wiring a ButterflyMX Smart Intercom directly to an electric lock
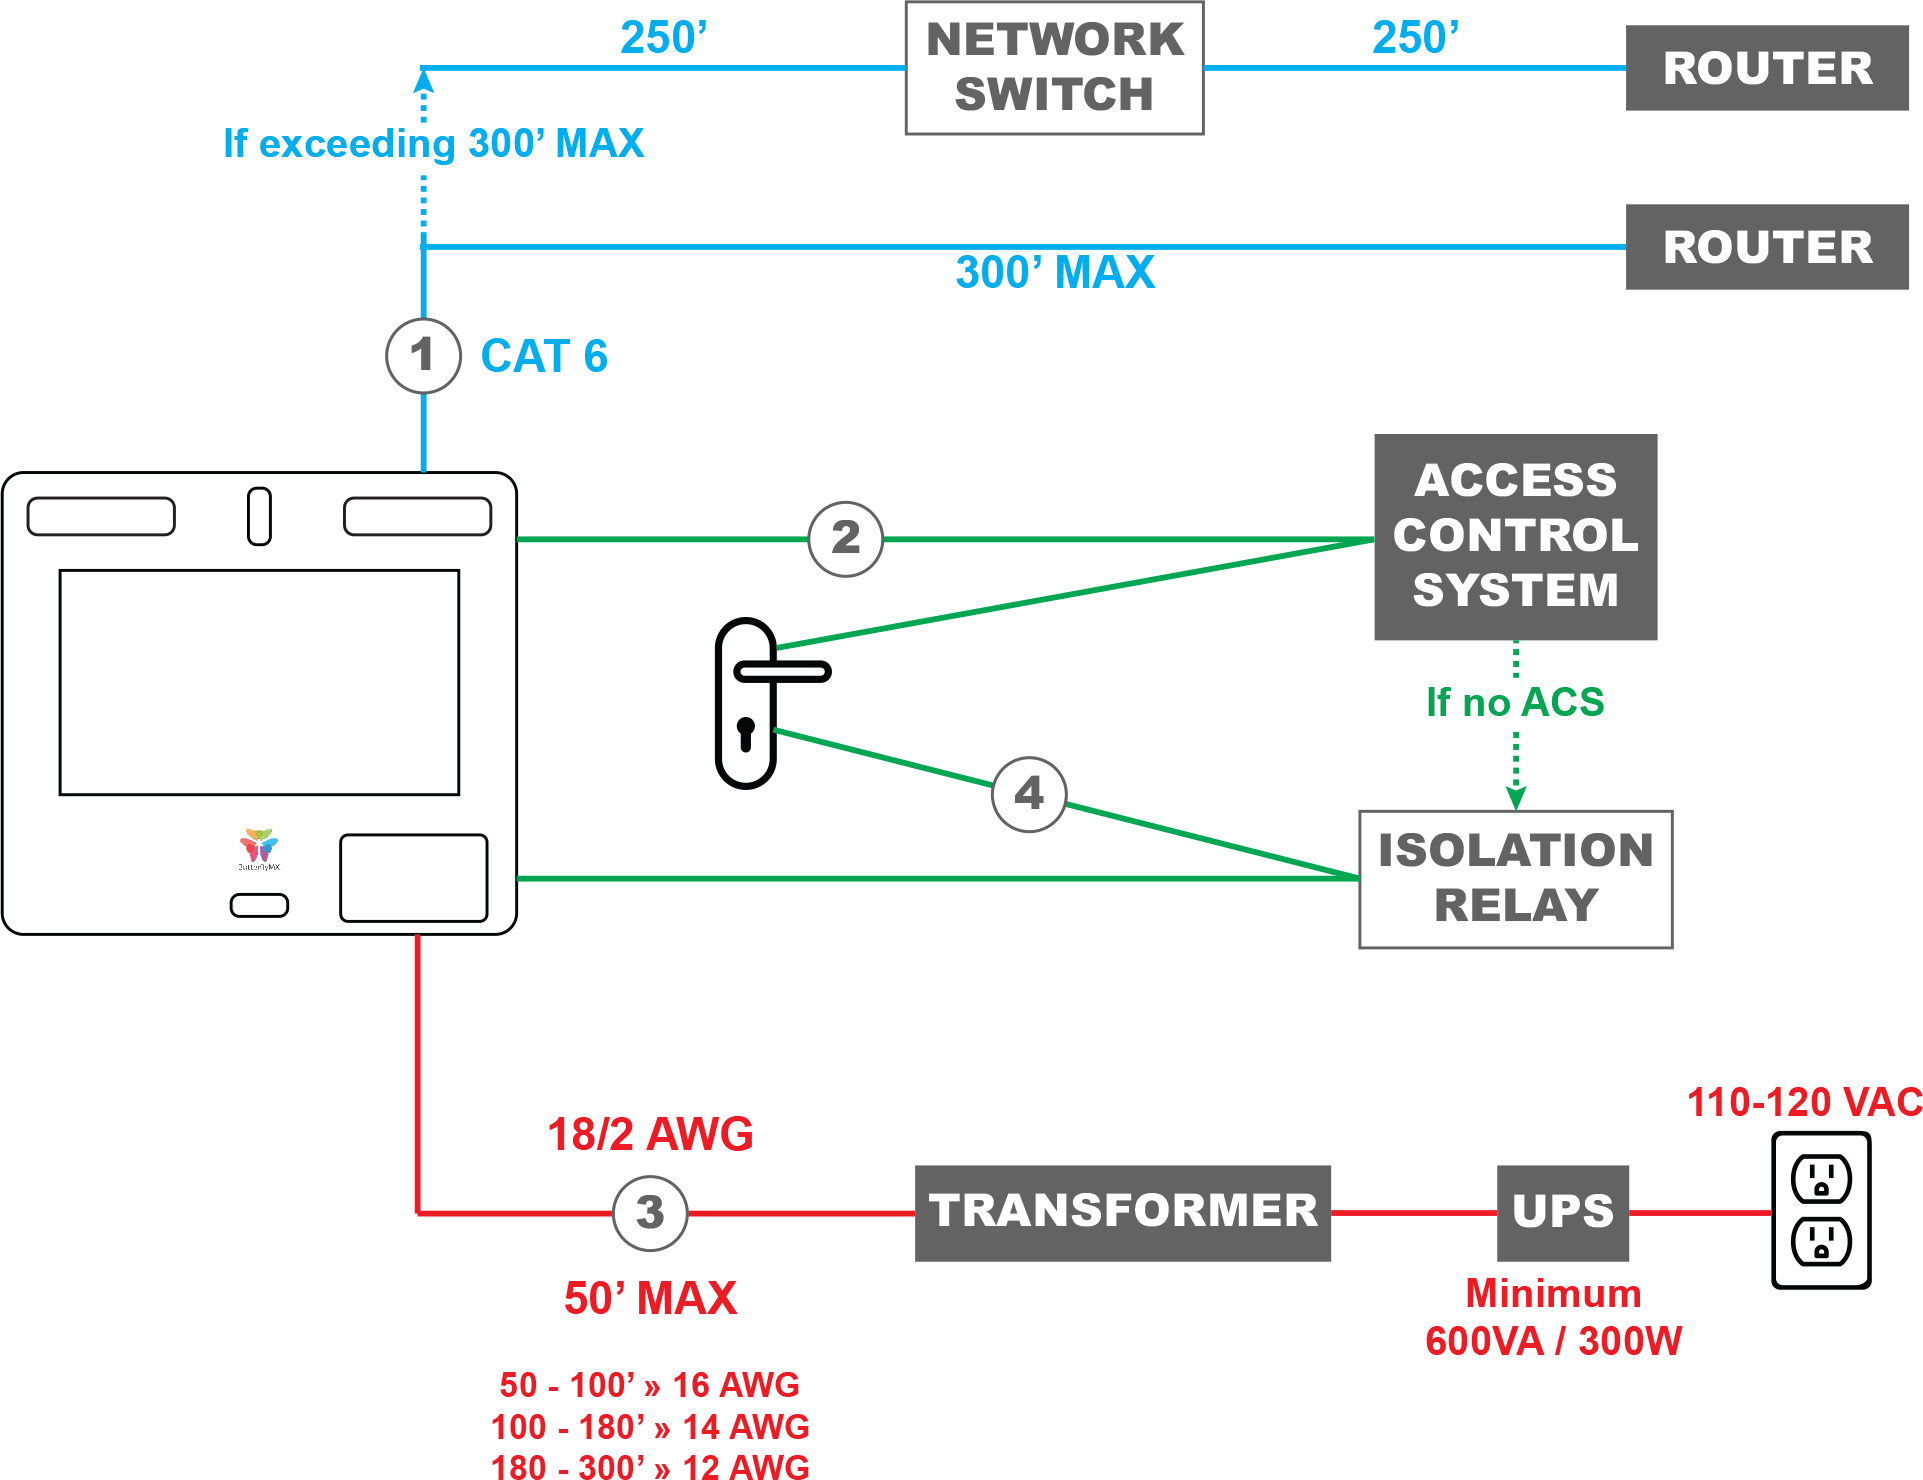
While it is always best to run an 18 or 22 AWG line from one of the Butterfly’s dry contact relays back to your access control system for REX, or Request to Exit, it is sometimes necessary to wire directly to an electric lock/strike. Maybe your building lacks an access control system or there is some physical obstacle that makes it impossible to run the line. Either way, protecting the smart intercom from inductive kickback voltage is necessary.
View our smart intercom wiring diagram
Inductive kickback voltage occurs when a continuously powered circuit is closed or interrupted, resulting in a momentary surge of voltage that can reach back to any connected equipment or components. This can cause component failure in the Butterfly, and there is no single symptom that indicates kickback voltage as a root cause. Instead, the detrimental effects of inductive kickback manifest in many different ways and need to be prevented during installation. The solution is to install an isolation relay (Altronix RB5) and a diode or resistor in the circuit connecting the Butterfly to the electric lock. A diode should be inserted for a DC-powered lock and a resistor for an AC-powered lock. The diode/resistor absorbs any kickback voltage and converts it to heat, which prevents it from being introduced to the Butterfly intercom. Check out our wiring diagram here, which includes links to our recommended products for the isolation relay, diode, and resistor.