When setting up ButterflyMX at your property, one of the first things you will need to do is add your building’s units and floors into the ButterflyMX OS.
If you use a property management software (PMS) such as Entrata, RealPage, Yardi, or Rent Manager, you can automate unit and floor management through our PMS integrations, which automatically transfers tenant, unit, and floor data into the ButterflyMX system.
If you do not use a PMS or have not integrated yours with ButterflyMX, you can add units and floors manually.
How to add units or floors to the ButterflyMX System
- Log in to the ButterflyMX OS
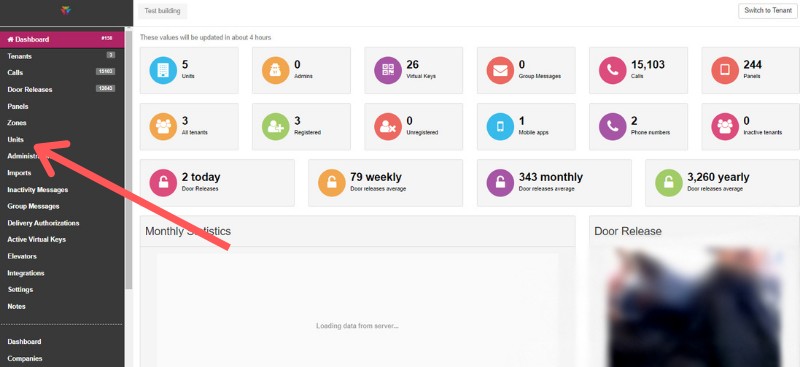
- Click ‘Units’ from the left-hand menu
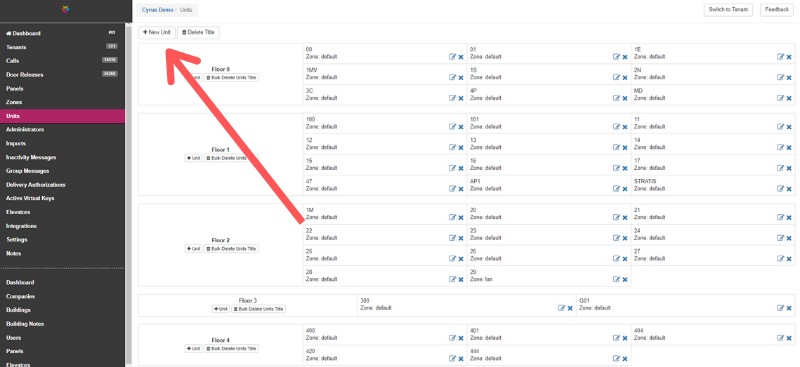
- Click the ‘+ new unit’ button
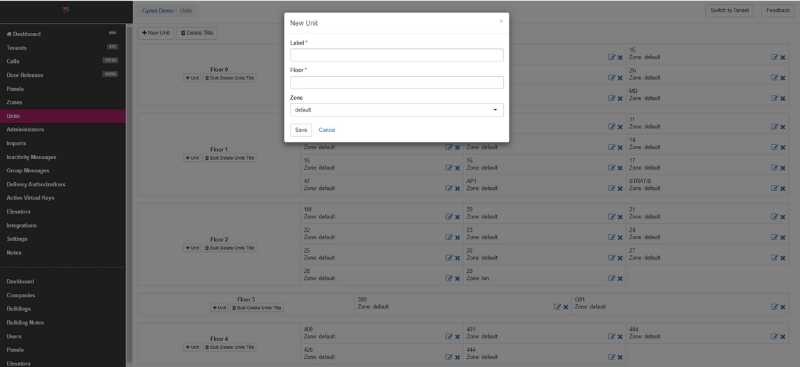
- Enter the unit and floor information
Step 1: Log in to the ButterflyMX OS
Log in to your ButterflyMX OS on a computer.
Step 2: Click ‘Units’ from the left-hand menu
Navigate to the menu on the left-hand side of the page and click ‘Units’. This section is a layout of your building, so you will see how many floors your building has, and which unit numbers are associated with those floors.

Step 3: Click the ‘+ new unit’ Button
To add a new floor or unit, click on the ‘+ new unit’ button at the top of the page.

Step 4: Enter the unit and floor number information
In the field titled ‘ Label’, enter the Unit Number. And the field titled ‘Floor number’, enter the Floor Number.

Once you have entered the unit and floor number, click ‘Save.’


