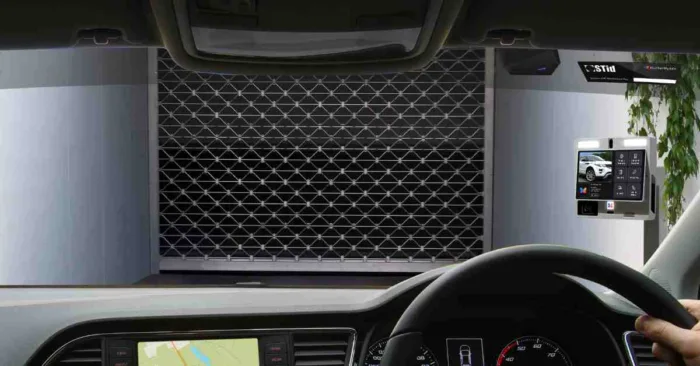
ButterflyMX’s vehicle access control system simplifies gate and garage access by empowering your residents and property staff to gain access without having to click a remote, scan a fob, or take your hands off the steering wheel. Upon arriving at your gate, garage, or another access point, you’ll simply drive up to the entryway. The ButterflyMX vehicle reader will scan your windshield tag, granting you instant access to the property.
Read this post to learn how to program those windshield tags.
This post covers:
- Prerequisites for programming a windshield tag
- How to program a ButterflyMX windshield tag with a tag programmer
- How to program a ButterflyMX windshield tag with a vehicle reader
Prerequisites for programming a windshield tag
Before you get started with programming a new windshield tag, you will need the following:
- ButterflyMX tag programmer or vehicle reader
- ButterflyMX windshield tag
- A computer with USB connection (or a dongle that supports USB)
- Access to the ButterflyMX OS
How to program ButterflyMX windshield tags with a tag programmer
To program a windshield tag with a programmer, follow these 7 steps:
- Plug in the USB programmer
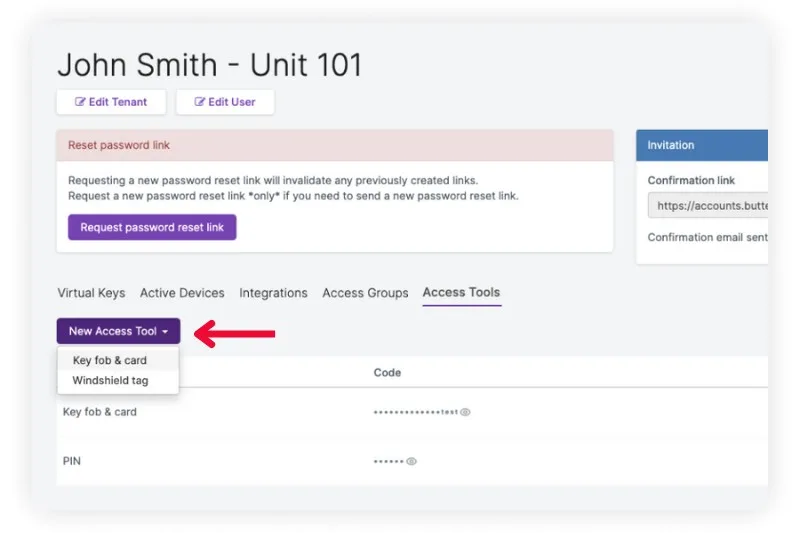
- Find the resident in the ButterflyMX OS
- Click on the “Access tools” tab
- Click “New access tool” and select “Windshield tag”
- Place a single windshield tag on top of the programmer
- Populate the ID number
- Repeat the process for each windshield tag
Step 1: Plug in the USB programmer
Simply plug the USB programmer into your computer.
Step 2: Find the resident in the ButterflyMX OS
Click the “Tenants” tab from the menu on the left-hand side of the page in the ButterflyMX OS and then search for the user you are programming the windshield tag for. Once found, click on their name to view their profile page.
Step 3: Click on the “Access tools” tab
Locate and click on the tab labeled “Access tools.”
Step 4: Click “New access tool” and select “Windshield tag”
Click “New access tool” within the “Access tools” tab. Then, select “Windshield tag.”
Step 5: Place a single windshield tag on top of the programmer
Place the windshield tag on top of the programmer. To avoid interference, make sure only one windshield tag is placed on the programmer at a time.
Step 6: Populate the ID number
Once the windshield tag has been placed on the programmer, its ID number will automatically populate in the “Identifier” field of the popup. It will automatically save to the resident’s access tools for you, so there are no extra steps required.
Step 7: Repeat the process for each windshield tag
Repeat this process for each resident that requires a windshield tag.
How to program ButterflyMX windshield tags with a vehicle reader
To program a windshield tag with a vehicle reader, follow these 6 steps:
- Tap the windshield tag on the vehicle reader
- Go into “Door Releases”
- Click the green plus “+” button
- Choose “Windshield tag” for the “Type” field
- Click “Save”
- Repeat the process for each windshield tag
Step 1: Tap the windshield tag on the vehicle reader
Simply tap the windshield tag you want to program on the building’s vehicle reader.
Step 2: Go into “Door releases”
In the ButterflyMX OS, find the “Door releases” tab on the menu on the left-hand side of the page. Locate the most recent door release that is labeled as “Denied.”
Step 3: Click the green plus “+” button
Click the green plus “+” button, and a pop-up will appear. In the popup, select the tenant you are programming the windshield tag for in the “Tenant” field.
Step 4: Choose “Windshield tag”
In the “Type” field, press “Windshield tag.”
Step 5: Click save
Click the save button to complete the programming.
Step 6: Repeat the process for each windshield tag
Repeat this process for each user that requires a windshield tag.