Key takeaways
- Visitor Passes allow residents to provide secure property access to trusted guests via QR codes or PINs
- You can set specific access times, expiration dates, and recurring schedules for Visitor Passes.
- Guests receive the Visitor Pass via email or text message with clear instructions, which they use by scanning the QR code at the intercom.
Note: We’ve recently changed the name ‘Virtual Keys’ to ‘Visitor Passes’ to better reflect the feature’s purpose. Learn more about why we made this name change.
Prerequisites
- You must have a ButterflyMX account
- You must have our mobile app on iOS or Android
- Your property owner or managers must enable Visitor Passes for your use. If Visitor Passes are unavailable in your mobile app, please talk to your property owner or manager about turning them on. ButterflyMX cannot turn them on at your property.
ButterflyMX Visitor Passes are the next step in access innovation. They take the form of QR & PIN codes that you send to trusted visitors like friends, family, and service providers (think anyone you’d want to give a key to your building to). They free you from worrying about a physical key that must be passed to someone. Instead, you can create them in the ButterflyMX mobile app and send them to guests as needed.
Visitor Passes are designed with your security in mind. You approve when your guests can use the passes, and you can always see who is using them. You can also delete them at any time.
How to issue and use Visitor Passes:
- Open the ButterflyMX mobile app
- Press ‘+ Visitor Pass’
- Choose a type of pass
- Name your pass
- Select when your pass will be active
- Choose an expiration date
- Click the “Create Pass” button
- Share your pass via text message or email
- Your guest receives the pass via a text message or email
- Your pass is received as a QR code with instructions
- To use the pass, a visitor clicks “Visitor Pass” on the ButterflyMX intercom
- The visitor lines up the pass (QR Code) with the intercom
Step 1: Open up the ButterflyMX mobile app
Launch the ButterflyMX mobile app on your smartphone.
Step 2: Press the ‘+ Visitor Pass’ button
Hit “+ Visitor Pass”.

Step 3: Choose a type of Visitor Pass
Choose your type of pass from the following options:
- Custom Duration Pass: This pass enables you to assign a visitor pass to a specific door from the door list (applicable to all pass types). You can set both a start and an end time for the pass, with the possibility of setting the end time up to one year in the future.
- Recurring Access Pass: This type allows you to designate specific days for pass validity and define access times on those days. For instance, you could set a pass to be valid every Monday from 9:00 AM to 5:00 PM, lasting up to one year. For continuous 24/7 access throughout the year, select all days and set the start time at midnight (12:00 AM) and the end time at 11:59 PM, covering 24 hours daily for the next 365 days. You can also set an expiration date up to a year ahead.
- Business Hours Pass: This pass is preset for Monday through Friday, from 9:00 AM to 5:00 PM. You can adjust the schedule to meet your specific requirements.
- Full Day Use Pass: This pass grants access for a designated day and expires at 11:59 PM on that day, according to the selected time zone.
- One-Time Pass: Designed for a single use, this pass automatically expires once used. If not utilized, it expires at 11:59 PM on the chosen date and time zone.
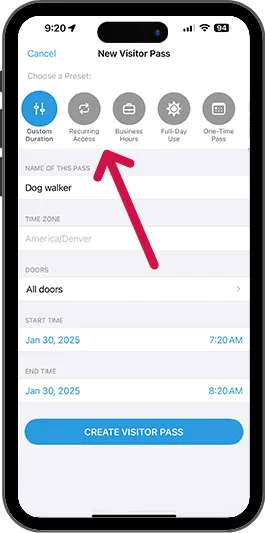
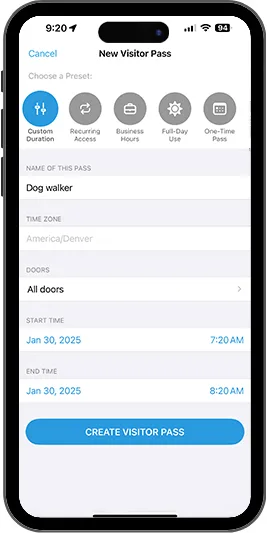
Step 4: Name your pass
You’ll then need to name the pass. In this example, we’ve named it ‘dog walker’.
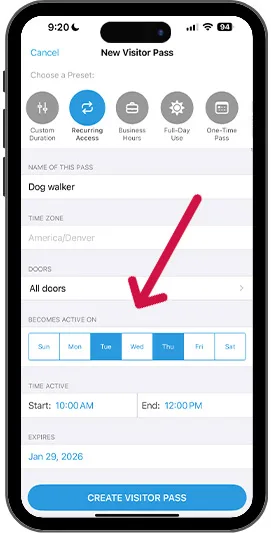
Step 5: Select when your pass will be active
If you’ve chosen to create a pass with custom duration or recurring access, you’ll need to select the days of the week and times of day that you want your pass to be active.
If your dog walker comes on Tuesdays and Thursdays between 2:20 and 3:20, choose those options.
Step 6: Choose an expiration date
Lastly, you’ll need to determine when the pass expires (note: once your Visitor Pass is created, you cannot adjust these settings).
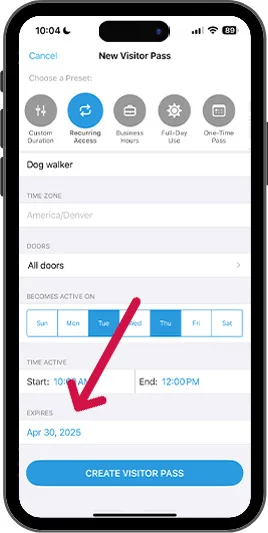
Step 7: Click the “Create Pass” button
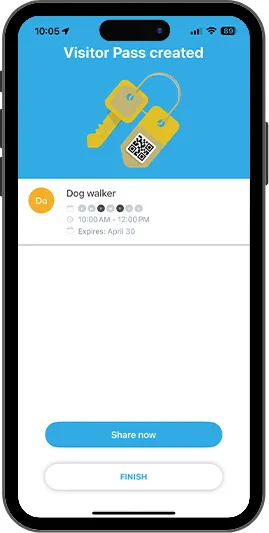
Click the “Create Pass” button. Once the pass is created, hit “Share Pass Now.”
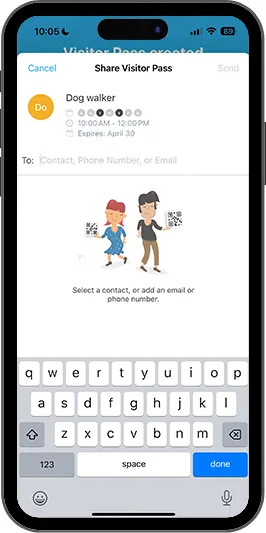
Step 8: Share your pass via text message or email
Enter the phone number or email address of the contact you’d like to send the pass and then hit “send.”
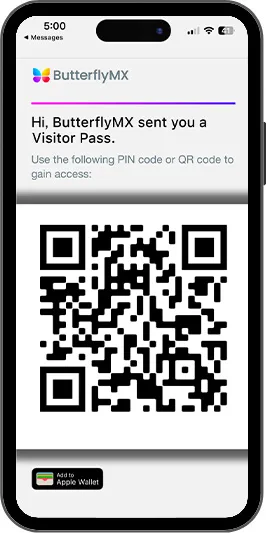
Step 9: Your guest receives the pass via a text message or email
Your guest receives the pass via a text message or email.
This is what they will receive:
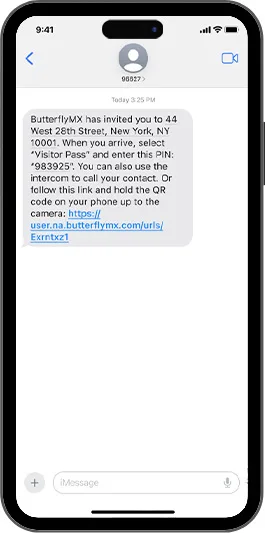
Step 10: Your pass is received as a QR code with instructions
Your recipient will receive instructions about the pass and the link to it. When they click on the link, they’ll see more details about the pass, including the ability to save it in their Apple Wallet and the QR code.
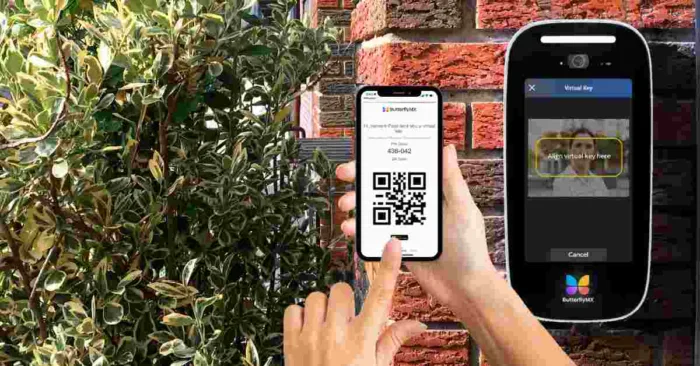
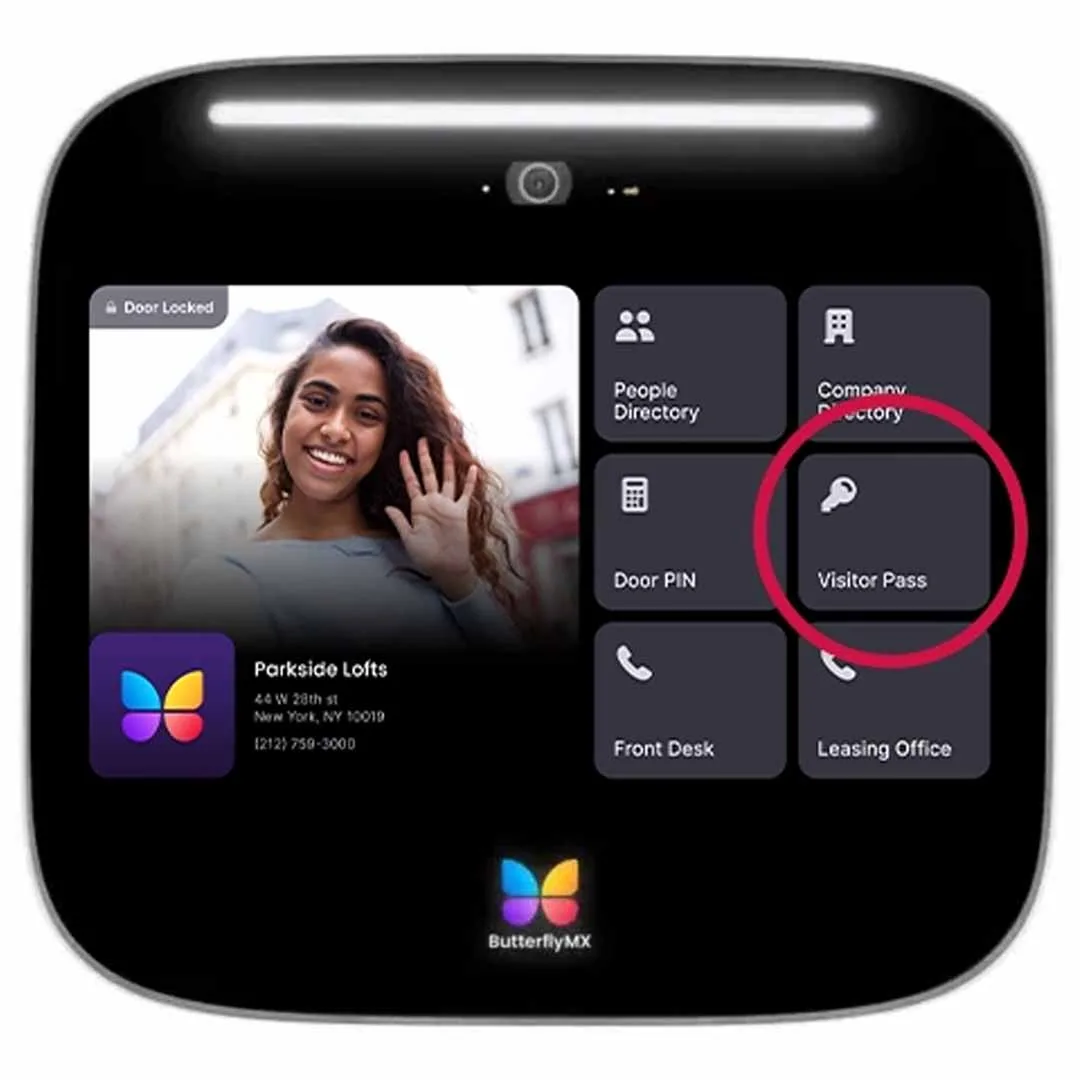
Step 11: To use the pass, a visitor clicks “Visitor Pass” on the ButterflyMX intercom
Once guests are at the door, they’ll click the ‘Visitor Pass’ button on the Video Intercom.
Pro tip: you do not have to click the ‘Visitor Pass’ button on the intercom. You can show your Visitor Pass to the intercom, and if it’s valid, the door will open.
Step 12: The visitor lines up the pass (QR Code) with the intercom
They will then see a prompt to line up the pass on their smartphone with the smart video intercom as shown below.
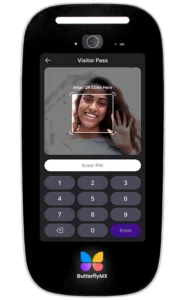
Once lined up correctly, they’ll hear a chime and see a notification that the door is open. For security purposes, our Video Intercom will take a time- and date-stamped photo of the person who used the Visitor Pass, which will be stored for review in your mobile app for 365 days.