As a property admin, you have access to ButterflyMX Access Groups, which allows you to create access groups within the ButterflyMX OS. These access groups let you grant certain tenants and building staff access to different parts of your property at different times.
Important note: Access management will only function in areas of the property where you have ButterflyMX-controlled doors.
Use cases for Access Management might include:
- Managing access for pay-to-use spaces such as the onsite gym
- Closing off common spaces with limited hours to residents, such as a roof deck, but keeping access for building staff
- Creating customized access for certain delivery services
How ButterflyMX Access Management Works
All ButterflyMX-equipped buildings start with a default access group. This means if no custom groups are set up, all users in your ButterflyMX system will have access to every ButterflyMX-controlled door.
Additionally, any new users who are added to the ButterflyMX system will automatically be added to the default access group.
How to create access groups:
- Log in to the ButterflyMX OS
- Select ‘Access Management’ from the left-hand navigation menu
- Select ‘Add Access Group’
- Choose a name for the group
- Select the doors this group will control (e.g., front door, gym, etc.)
- Select users for your group
- Hit ‘Save’
Step 1: Log in to the ButterflyMX OS
Log into the ButterflyMX OS on a computer or mobile device.
Step 2: Select ‘Access Management’ from the left-hand navigation menu
Select ‘Access Management’ from the left-hand navigation menu. Here, you will see an overview of your current access groups. If this is your first time here, you will only see the default group.
The overview of your existing groups contain the following information:
- Name of the access group (i.e., gym)
- Number of doors controlled by access group
- Number of tenants currently in the access group
- When the access group was created
- When the access group was last updated
From here, can also delete and duplicate groups.
Step 3: Select ‘Add Access Group’
Select ‘Add Access Group’.
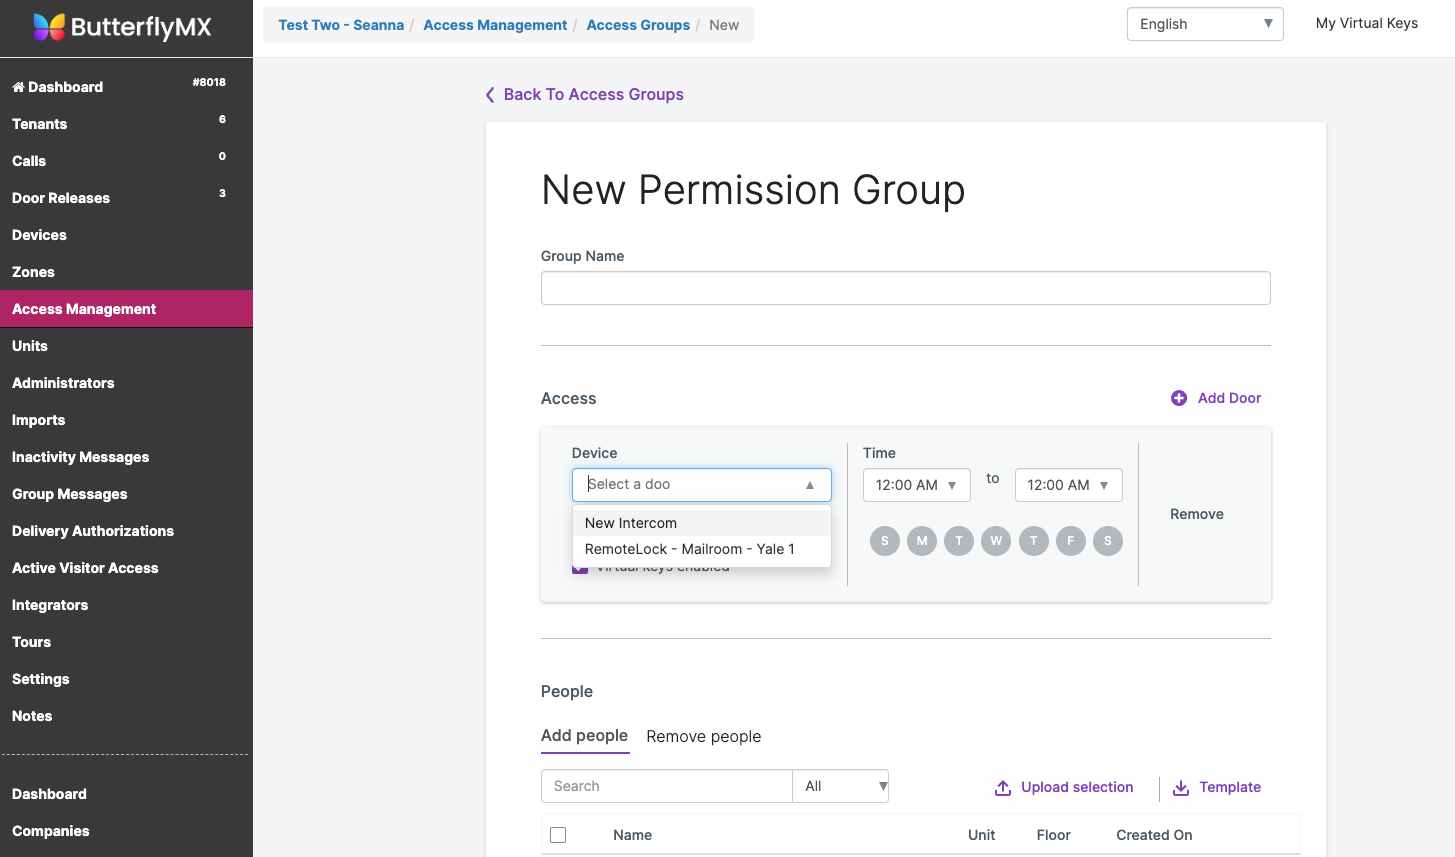
Step 4: Choose a name for the Access Group
Choose a name for your group. We recommend choosing a name that clearly represents the area that the door controls or the set of people who are in the group. For example, if you are creating an access group for the gym, simply call it ‘Gym’. If you are granting access to all the doors for your staff, name it “Staff”.
Step 5: Select the doors this access group will control
Select the doors this access group will control (e.g., front door, gym, etc.). Doors can be used more than once if you’d like to set up different time windows. For example, if your roof deck has different hours on weekdays vs. the weekend, you can add the door twice to make this distinction.
Step 6: Select the doors this access group will control
You can either add users in bulk by uploading a .CSV file, or you can select users individually by searching for them by name.
Step 7: Hit ‘Save’
Hit ‘Save’, and then you’re all set.
Remember: You can add, disable, or edit access groups at any time.
If there are additional doors or gates at your property you would like to add a ButterflyMX product to, please contact our sales team for a consultation.