
Key takeaways
- Tips for wireless camera system installation include planning before buying cameras, choosing the right camera, finding the best camera placement, mounting your cameras, and connecting your cameras.
- You can find a camera system installer by seeing if the manufacturer includes installation with the purchase of cameras and by checking property management forums online.
Security cameras are one of the best physical security measures for your property. However, camera system installation might seem like a daunting task. Luckily, there are plenty of ways to go about installing a camera system.
In this post, we’ll cover the fundamental camera installation steps that will lead to a more efficient camera setup. Next, we’ll discover how to find a professional camera installer. Finally, we’ll answer some common questions.
This post covers:
- The best security camera system
- How do you install a security camera system?
- How much does it cost to set up a camera system?
- How to hire someone for camera system installation
- Camera system installation FAQs
The best security camera system
ButterflyMX stands out as the best security camera system because we offer powerful and resilient cameras that are designed to provide reliable security around the clock.
What’s more, we offer flexible security and access control solutions that are tailored to meet your diverse property’s needs.
Key features & benefits of our cameras:
- Durable design. Our powerful and durable Cameras are weatherproof and built to withstand tampering and harsh weather conditions. So, you can rest assured that they’ll operate optimally in any environment.
- Versatile options. Available in dome and bullet models, our line of Security Cameras provide the flexibility you need to cover your diverse security needs and locations. For example, our Dome Cameras are great for providing insights into areas like lobbies, hallways, garages, and common areas. Whereas, our Bullet Cameras offer precise, long-range views of activity — making them ideal for perimeter areas and entrances.
- High-definition footage. Capture clear, detailed video so you never miss a moment at your property.
- Night vision. Our Security Cameras ensure 24/7 property security by providing clear video in low-light and nighttime conditions.
- PoE (Power over Ethernet) simplifies installation. Our cameras use a single CAT5e/6 Ethernet cable for both power and data, reducing installation complexity and costs.
- Unified system. Our Security Cameras connect seamlessly with our Video Intercom and Access Control System, offering a comprehensive security solution for your property.
- Convenient management. Centralize control and monitoring through a single interface and streamline your business’s security operations.
- ONVIF compatibility. Our Gateway is compatible with a wide range of existing ONVIF-compliant cameras, allowing you to upgrade your security system without replacing all existing hardware. So, you have the peace of mind of knowing you’re choosing a scalable solution that will grow with your property’s needs.
How do you install a security camera system?
In theory, security camera system installation is as easy as unboxing your camera system, connecting it to a power source, and pointing the lens toward the areas that you want to monitor. However, commercial security camera systems require much more effort and knowledge when it comes to installation.
Above all, it’s best to hire a professional installer to set up your security camera system. That way, you receive a hiqh-quality installation that ensures your cameras work and operate the way they were designed. With that said, it’s best you know the process of installing security cameras so you can be prepared for the project.
The five steps for camera system installation:
- Come up with an installation plan before buying cameras
- Choose the right camera
- Determine camera placement
- Mount and wire your cameras
- Connect your cameras
1. Come up with an installation plan before buying cameras
The first step to installing a multi-camera system is to figure out how you want to install your cameras, which includes steps three to five on our list. You’ll need to familiarize yourself with your property and learn what it needs out of a camera system.
If you’re looking to monitor a single front entranceway, then that’s important. If you’re looking to monitor multiple entranceways, your parking lot, and three private floors in your building, that will result in a vastly different setup process.
You should note whether your building has:
- A high volume of visitors and foot traffic.
- Good WiFi connectivity.
- Complicated electrical wiring.
- Difficult camera mounting surfaces, such as cement.
Additionally, you should determine if security cameras are right for your property at this time. While security cameras can benefit all properties, they aren’t always the first solution to consider. Instead, you may want to implement an access control system. An access control system acts as a great first step towards addressing your building’s security concerns and helping modernize your property.
2. Choose the right camera
Now that you have an installation plan, you are ready to select the right camera. However, there are a lot of different cameras to choose from. There are also a variety of different camera system installation costs to consider. This seems difficult, but if you know your building well, then it won’t be.
Features to look out for in cameras:
- WiFi connectivity. You likely want a CCD camera that you can remotely monitor from your mobile device. Footage can also be stored on cloud servers for you to access at any time.
- Video features. You will want a camera that can zoom. Additionally, you will want a camera with a wide-angle lens and night vision to monitor large areas at all times of the day.
- Installation requirements. Wireless cameras, as the name implies, are much easier to install. Conversely, they will have some sort of battery life that you’ll have to monitor and plan for.
- Weather-resistance. You never, ever want to install indoor cameras outdoors. This is mostly because they have no weather-resistance and could be destroyed the next time it rains or snows. For the best experience, choose cameras that are designed for indoor and outdoor use.
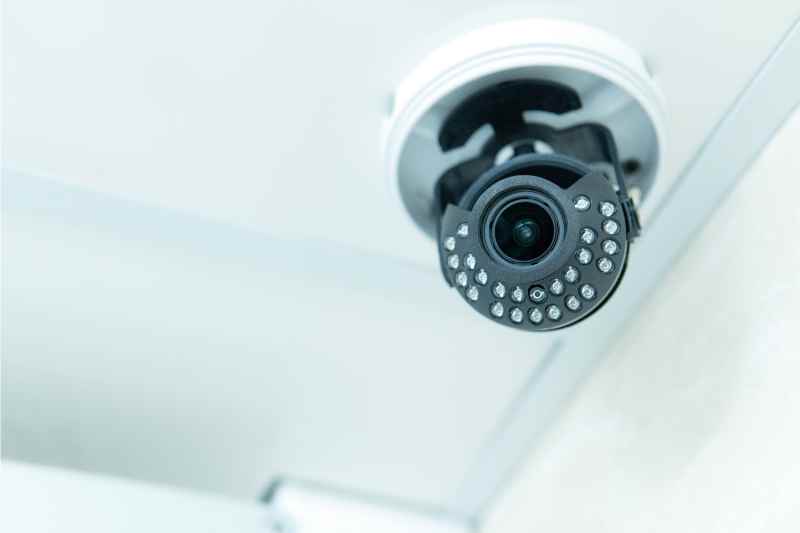
3. Determine camera placement
Effective camera placement is one of the most important steps on this list. If you place them the wrong way, they’ll be useless.
For both indoor and outdoor camera placement:
- Position cameras in corners. This often gives them maximum visibility over a certain area.
- Keep out of reach. You don’t want anybody to be able to reach up and vandalize your cameras.
- Avoid blind spots. If one camera has major blind spots, then you might want to consider a second camera that specifically covers those blind spots.
Outdoor cameras have a few extra requirements to keep in mind.
For outdoor camera placement specifically:
- Position against the elements. You will want to make sure that your camera is angled to prevent rain or snowflakes from accumulating on the lens and obscuring the camera’s point of view.
- Plan for the sun. Determine where the sun sets in relation to your property and try to ensure that your camera will not be rendered useless by a glare.
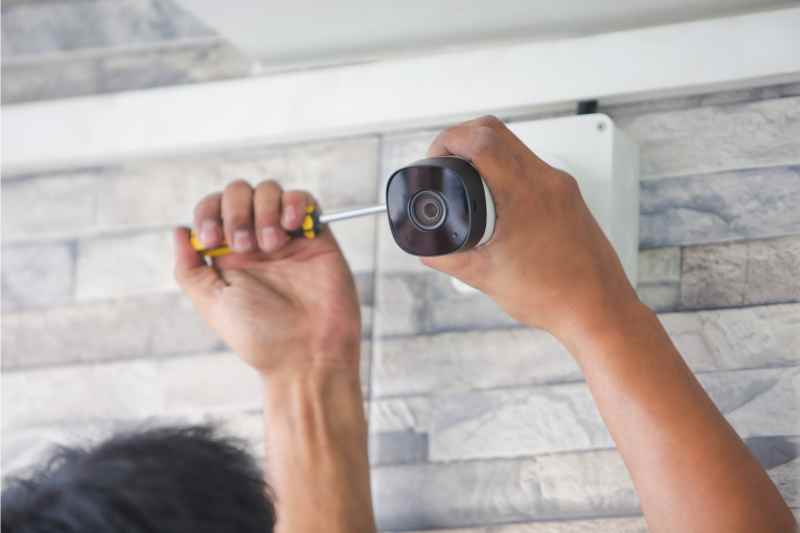
4. Mount your cameras
This step will vary depending on the cameras you’ve purchased. However, there are a few basic things that you should keep in mind. Every camera has a compatible mounting panel, which will often need to be purchased separately. Make sure that you are purchasing a compatible mounting panel for your camera, or you will have a headache on your hands.
Most camera mounting kits come with the screws that you will need to mount the camera. From there, the main thing to remember is that you want to mount your camera on a flat surface so it’s completely stable.
Note that most mounting kits will not work on brick or other hard surfaces. If your building has these features, then you will likely want to hire a professional camera installer.
5. Connect your cameras
This last step should be the easiest. Now that your camera is mounted and officially installed, you must connect to it. Your specific camera will have detailed instructions on how to connect it, and we suggest you follow them closely.
When connecting your cameras, you should keep in mind to:
- Make sure that your WiFI is on and in the range of your cameras.
- Download and sign in to all apps associated with your camera.
- Ensure that power sources for your cameras are functioning properly.
Learn how ButterflyMX works:
How much does it cost to set up a camera system?
Security camera installation costs about $50 to $300 per camera. Additionally, if you choose to hire a professional camera system installer, then you will need to spend between $100 and $500 more per camera. As a result, many property owners choose to install their camera systems themselves.
How to hire someone for camera system installation
Professional security camera installation is often the best choice you can make when it comes to setting up your property’s security system. However, this is only a good idea if you can afford the installation fees.
You can often find a camera system installer at the place where you buy your cameras. For example, Best Buy offers installation for its wireless cameras and security cameras when you purchase them online. However, camera system installation from Best Buy will cost you an additional fee, ranging from $129 for two cameras to $229 for eight cameras.
The best way to find camera system installers is to:
- Scout property management forums. Other property managers have been in the same position as you when it comes to finding a camera system installer. See which cameras they purchased and who they used to install them.
- Check out reviews of the cameras. Reviews for the cameras you decide to purchase often mention who installed their cameras (or if they’re easy to install yourself).
- Google local service providers. You can find local camera system installers pretty easily on the internet. You will want to check their reviews and make sure that they install the type of camera you’re looking to purchase. If you have a commercial business, you’ll want an installer who has worked with other local businesses’ security systems and has experience installing CCTV cameras in commercial properties. Also, getting a quote from multiple installers in your area is not a bad idea to find the best experience.
- Contact the manufacturer. If you’ve found a security camera system you want, reach out to the manufacturer to ask for a certified installer. They’ll connect you with a reputable installer who has been trained to install their system, ensuring you get a quality install and a valid warranty.
Camera system installation FAQs
Commonly asked questions about camera system installation include:
- How long does it take to install a camera system?
- Do you need WiFi to install cameras?
- Can I install security cameras myself?
How long does it take to install a camera system?
A four-camera system is anticipated to take between four and six hours to install. Installing additional cameras will increase the installation time by about an hour and a half per camera. However, this all depends on the size of your building. If your cameras are wired, this will also take additional time. Complex camera systems such as CCTV camera installation can take over a day.
Do you need WiFi to install cameras?
You will need WiFi to install a camera if the camera runs on WiFi. Otherwise, you won’t be able to connect and monitor your camera from your mobile device or computer.
Additionally, you won’t be able to store your camera’s recordings anywhere.
However, not every camera runs on WiFi. Some transmit their recordings to local storage systems, such as microSD cards. In this case, you will not need WiFi to install these cameras.
Can I install security cameras myself?
Yes, security cameras are often easy to install yourself. This is especially true if you follow the above advice we have offered. However, if you have a system with more than five cameras, you will want to consider a professional camera installer.
Cameras are effective at capturing evidence to reduce security risks, so you want to make sure that they are installed correctly.

Get your free quote!
Fill in the form below, and we'll email you right back.
Want a free quote?
Fill in the form below, and we'll email you right back.
You’ll be redirected shortly...