Key takeaways
- ButterflyMX Video Intercoms provide live video and mobile access control, allowing residents to see visitors before granting access.
- Property managers, owners, and developers benefit from increased security, resident satisfaction, and reduced installation costs.
- Residents can personalize their experience by choosing between video or audio calls via the mobile app.
Unlike other property access systems that only make audio calls, our Video Intercoms provide live video and mobile access control. This way, residents & tenants can see who’s at their door or gate before granting them property access — but don’t worry, visitors cannot see the resident or tenant (unless they want them to).
Real estate professionals also enjoy the benefits our video calling provides:
- Property managers value the added security: our intercom system takes time- and date-stamped photos of everyone entering their building.
- Owners and developers enjoy increased resident satisfaction through an enhanced living experience. With ButterflyMX, you avoid the added costs of building wiring and in-unit hardware, which comes with traditional video intercoms.
How to get the most out of ButterflyMX video calls:
- How video calling works
- Setting up your intercom for the perfect video calls
- Adjusting the intercom’s camera
- Adjusting the intercom’s speaker
1. How video calling works
Once a resident registers for ButterflyMX and downloads our mobile app, they can receive a video call (similar to a FaceTime) when a visitor selects their name from the directory.
Pro tip: as a resident, you can adjust whether you want to receive a video call or just an audio call right from within your mobile app.
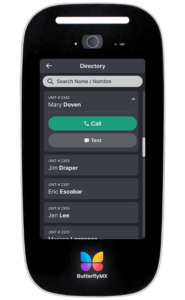
When a visitor, delivery person, or service provider approaches one of our video intercoms at the entryway or gate of a property, they simply use the touchscreen intercom to search the directory by resident name or unit number.

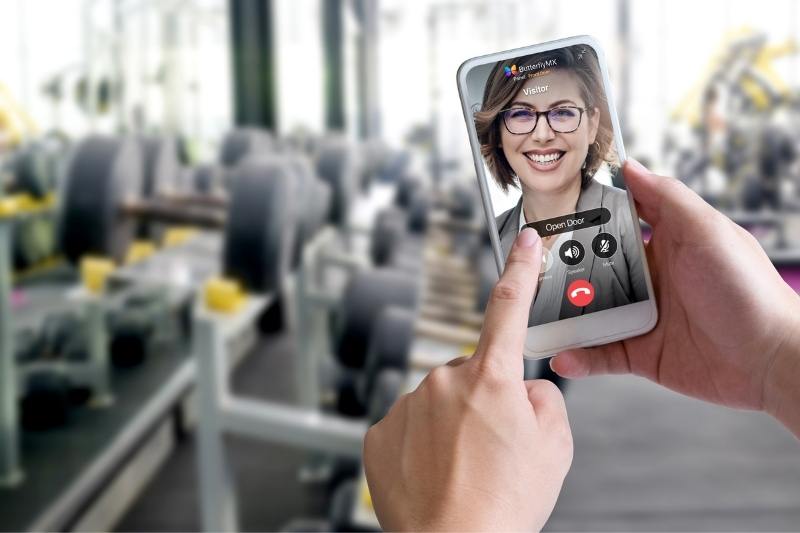
Then they click ‘call’ on the resident, and our smart intercom makes a video call to the resident’s smartphone. The call begins as a one-way video and audio call. Meaning, the resident can hear and see the visitor, but the visitor cannot see or hear the resident. This is nice when the resident is expecting a guest and does not need to communicate with them. They simply need to press ‘Open door’, and the door/gate is opened for the visitor and the call ends.

If the resident picks up the call (because they don’t recognize the visitor or they want to have a conversation), the call automatically defaults to one-way video & two-way audio. This means the resident can see and hear the visitor, but the visitor can only hear the resident. This is nice when they want to communicate with a visitor but don’t want the visitor to see them. The tenant can still provide access to the property at any time. All they have to do is press the ‘Open door’ button or they can hang up and the call ends.
Finally, in the event the resident wants to have a two-way video and audio call (for example, when their unexpected visitor is a friend or family member and they want to share a special moment with them), the resident simply needs to push the ‘camera’ button during the call and voila, the resident is having a two-way video and audio call with their visitor. At any time they can grant access to the property by pressing ‘Open door,’ or they can simply end the video call by hanging up.
2. How to set up your intercom to have the perfect video calls
To ensure that your property takes full advantage of the video calling feature, there are two things you should consider:
1. How high did the installer mount the video intercom? Our installation cut sheets recommend 48″ from the ground to the top of the usable screen to maintain ADA compliance. However, in reality, some installations are higher or lower because of a property’s limitations (there could be a stone wall or lack of wiring at your entryway, which caused the installation to be different than the recommended height of 48 inches).
2. Will there be any background noise where the smart intercom is mounted? Was it installed at a vehicular gate with lots of noisy car traffic? Or, is it at a less noisy pedestrian entryway?
Once you have answered these questions, we can make camera and speaker adjustments to your intercom — this will ensure your residents, visitors, and the onsite staff are getting the most out of video calling.
3. Adjusting the camera on your intercom
We recommend installers place our smart video intercoms 48” from the ground to maintain ADA compliance. There are instances, however, they cannot achieve this height. For example, if there’s hard building material such as brick or stone where the intercom would otherwise go. If this is the case, and your intercom ends up above or below the 48” mark, we can adjust the tilt of the camera inside our video intercom so that it will still capture the visitor’s face.
To do this, please reach out to your Account Manager or submit a support ticket, and our team will adjust your camera to the right tilt so that you and your tenants will be able to clearly see who is at the front door before letting them in.
Important note: please do not attempt to open the intercom to do this yourself. You will break the watertight seal of the intercom and void the 2-year warranty.
4. Adjusting the speaker on your intercom
If you’d like to adjust the volume of your intercom’s speaker, our Support Team can take care of this for you. Simply reach out to your dedicated Account Manager or submit a support ticket. Once our support team makes the adjustment, have someone test the sound to make sure the volume is at the appropriate level. Let your Account Manager know if it still needs to be adjusted further.
We’ve designed our smart intercoms to be extremely flexible and adaptable. If you ever want to make adjustments, please reach out to us and we’ll do our best to accommodate.


